Ask the Insight Agent a question about how Caplena works — it'll answer directly, no need to leave your project and dig through documentation.
📢 Changelog – Fresh Features & Fewer Bugs (Hopefully)
Ah, updates - like taxes and awkward Zoom calls, they’re inevitable. But at least ours are more fun, come with fewer surprises and (hopefully) more fixes. Here’s where you’ll find what’s new, what’s improved, and what we accidentally broke (but promptly fixed). So grab a coffee, take a deep breath, and dive into the wonderful world of feedback evolution - one update at a time.
Ask the Insight Agent a question about how Caplena works — it'll answer directly, no need to leave your project and dig through documentation.
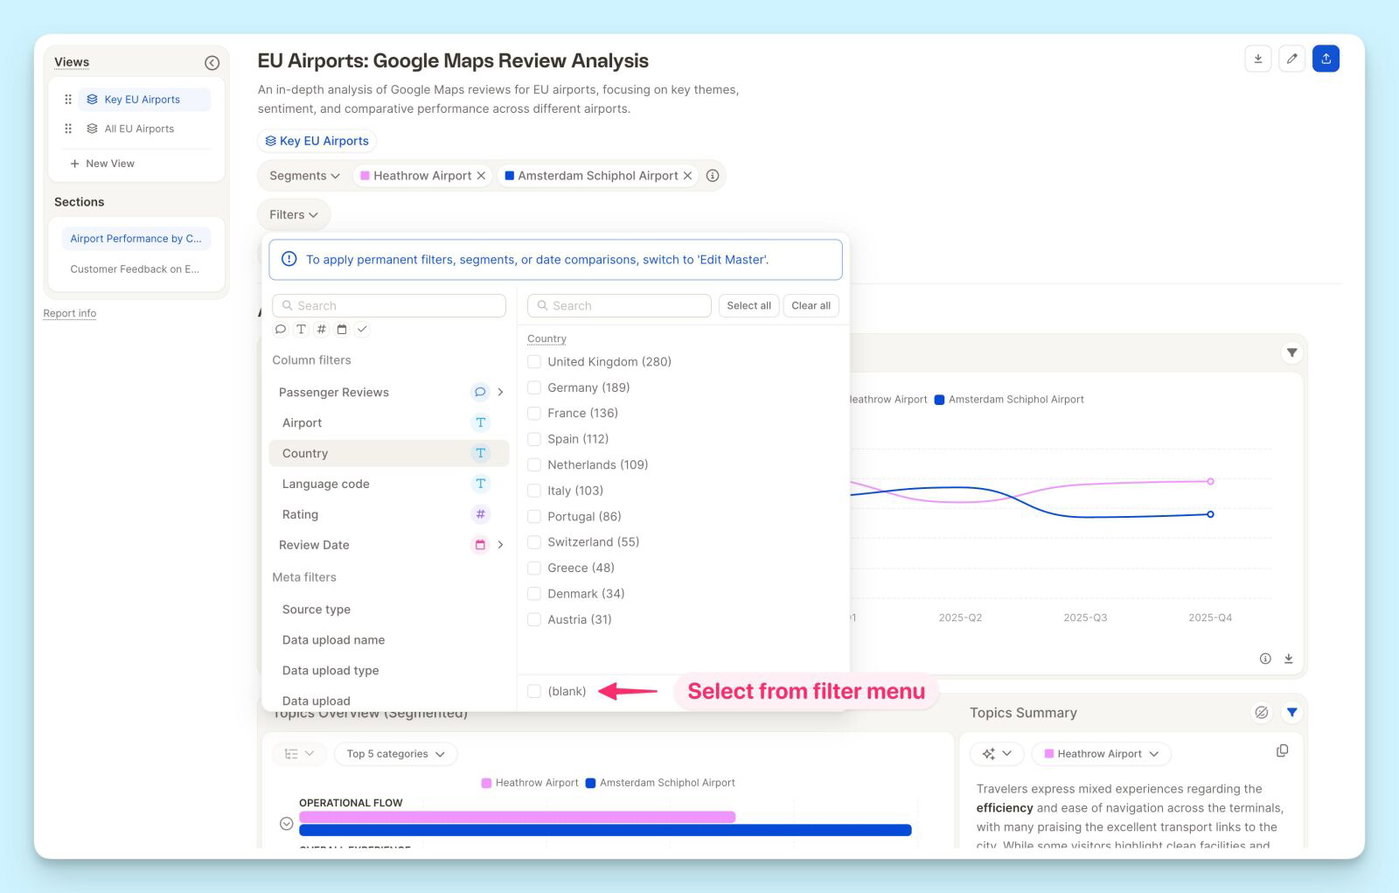
You can now filter any column by blank — empty cells are no longer invisible to your filters.
Whether you're tracking down a missing date, a smart column that didn't populate, or a row with an identifier error, just select the "blank" filter and they'll surface instantly. No more hunting through your data manually.

Keep your topic collection in sync across projects — without rebuilding from scratch.
Large trackers evolve, but changing a live topic collection is risky: one edit can affect trend lines, reports, and stakeholder trust. The Learning Relationship gives you a structured way to manage that evolution. Link a development project to your production project, experiment on a representative sample, and push only validated changes back into your live tracker.

Link two projects in Settings: In Topic Settings, select a source project under Learning Relationship — typically a development project that mirrors your production tracker at a smaller sample size.
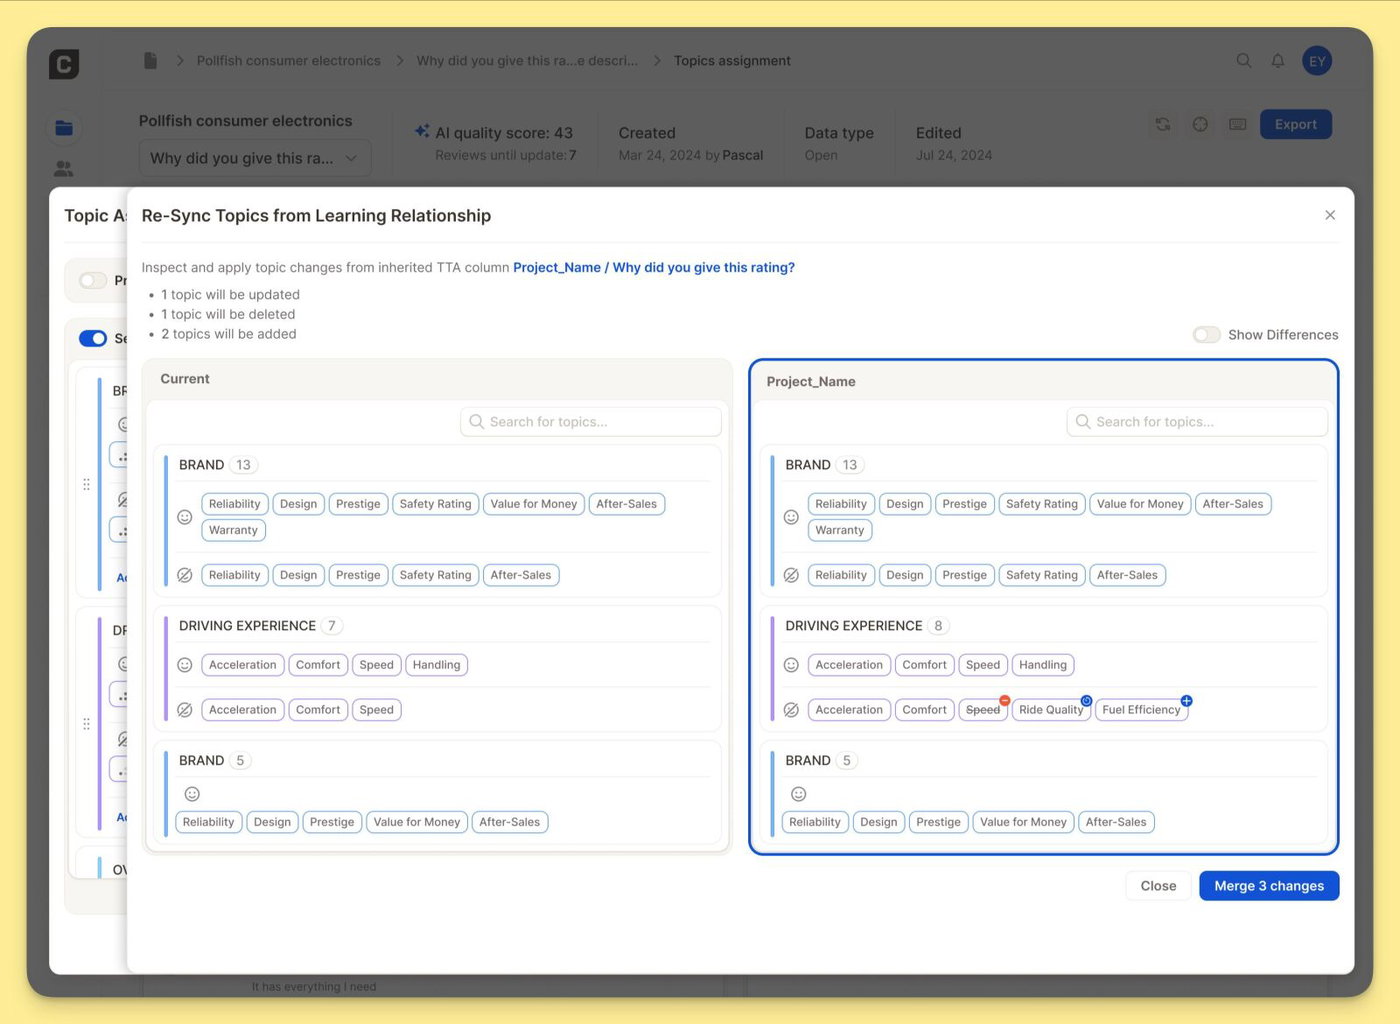
Re-sync when you're ready: Use Re-Sync Topics from Learning Relationship to see your current topics next to the linked project's topics. Enable Show Differences to highlight exactly what has changed — topics to update, delete, or add. Nothing is applied until you choose to merge. One click pushes the validated changes into your current project
Want to set this up for your tracker? Reach out to your CSM — they'll help you get started.
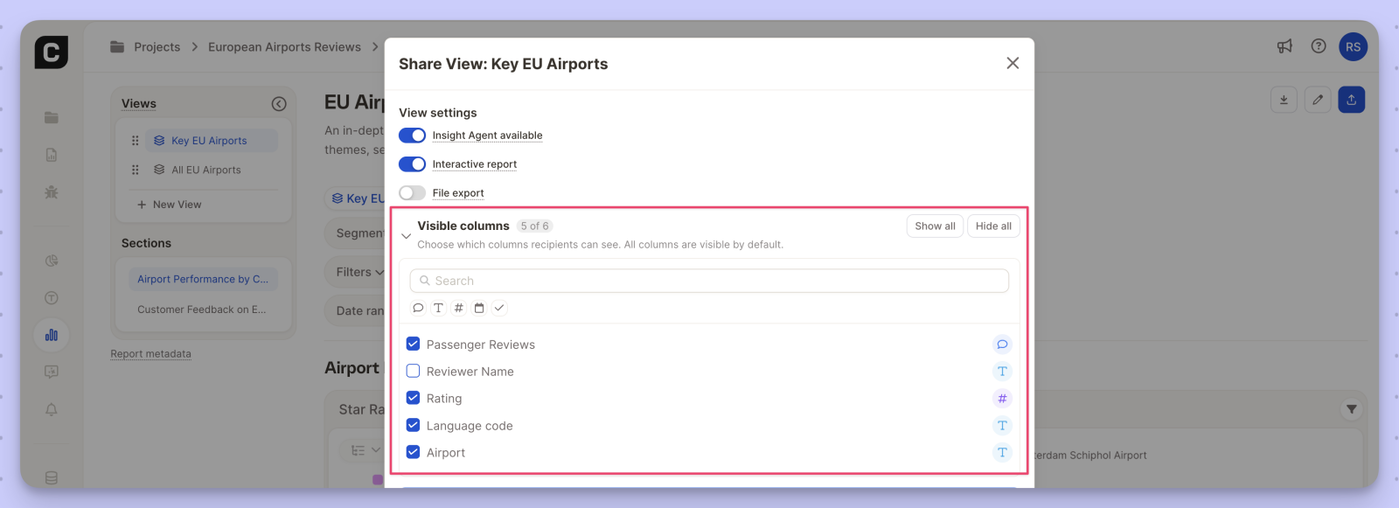
You can now control exactly which columns report viewers see when you share a view.

What's new
Why it matters Share cleaner, more focused views with external stakeholders or specific teams — without exposing raw data columns that aren't relevant to them.
We've launched a redesigned documentation experience at docs.caplena.com — easier to navigate, faster to search, and built to match the rest of the Caplena experience.
Content is organized into six focused sections — Get Started, Topic Assignment, Insights & Reports, Data & Project Management, Integrations, and Settings — so you can find what you need without digging.
Full-text search is faster and more accurate, so you spend less time browsing and more time doing.
The docs now match the visual style of caplena.com, giving you a more seamless experience across the product.
Note: Your existing bookmarks still work
All previous links redirect automatically. If you come across a broken link, please let us know at support@caplena.com.
We are excited to introduce the Caplena MCP Server, seamlessly integrating your preferred AI applications with Caplena’s Insight Agent. This new capability empowers you to leverage insights within your AI app to help taking action based on customer feedback.
Versatile Connectivity: Connect Caplena's Insight Agent to leading AI applications such as Claude, Copilot, Codex, ChatGPT, and more. Our MCP supports a wide range of AI tools, ensuring that you can leverage our insights wherever you work.
Dynamic Usage: Use insights generated by our Insight Agent directly within your AI application. Whether it’s replying to colleagues’ questions about customer feedback via email, creating a comprehensive PowerPoint report with embedded insights, or prioritizing your project backlog based on customer feedback, Caplena MCP has you covered.
Project Status: To take full advantage of Caplena MCP, ensure that your projects are set to "live" status. Only live projects can be accessed and utilized via the MCP, ensuring that you are working with the most current and relevant data.
Activate the MCP in the Integrations Page
Connect Your AI Applications: This step is specific to your AI app, ask it with a prompt or consult the documentation on how to install an MCP server.
Utilize Insights: Start using Caplena insights in your AI applications to enhance communication and decision-making.
Use Caplena to analyze Zendesk support tickets effortlessly
Key Features:
1. Easy Setup: Connect your Zendesk account to Caplena in just a few clicks.
2. Daily Sync: Automatically sync ticket data for up-to-date analysis.
3. Advanced Text Analytics on conversations: Gain insights into trends, issues, and sentiments. Powered by our conversation analysis feature.
Check our documentation to see how to connect your Zendesk account in Caplena to get started.
The LLM-powered translation in Caplena now understands your project — not just your words.
Translation has always been tricky when your data contains industry jargon, brand names, or survey-specific terminology. Generic translation tools don't know that "Comfort" is a fabric softener brand, or that "awareness" in your survey means something very specific.
That's why we've added context to the translation process. Caplena in the new LLM based translation now passes your project description and column descriptions directly to the LLM when translating — so it understands what it's translating, not just the words themselves.
For most everyday language, translation works well out of the box. But the real difference shows up in edge cases: brand names that shouldn't be translated, product-specific vocabulary, or subtle phrasing that carries meaning in your survey context. With added context, the LLM can make smarter, more faithful translation decisions — right where it counts.
Select the LLM based translation when creating the project.
The Topic Sentiment insight element now supports comparing multiple segments side by side in a single view.

Previously, analyzing sentiment across segments required switching the segment filter back and forth. Now, when multiple segments are selected, the chart displays all of them at once, stacked by segment, so you can immediately see how sentiment on each topic varies across your audience.
What's new:
You can now analyze full chat(bot) conversations — not just individual comments — directly in the Topics View.
When you enable Chatbot Conversations, Caplena displays each row as a threaded conversation between speakers, with bot and user messages shown in context. Every message is individually tagged with its topic and sentiment, so you can see exactly where a conversation shifts from a product question to a support request.
Define who's who in your data by mapping name identifiers (like <<USER>> or <<BOT>>) to readable speaker names such as "Customer" and "Chatbot." Caplena supports WhatsApp-style timestamps and common chat export formats out of the box, and you can add as many speakers as you need.
Enable Chatbot Conversations in your project's Topics settings to get started.

We've completely reworked how you create and manage segments in Caplena — making it faster, more flexible, and a lot more powerful.

The new Segment Editor gives you two ways to get started: manually or via AI prompt.
If you know exactly what you're looking for, the Manual path lets you build segments by combining filters — topics, categories, sentiment, rating, date range, and more. You get precise control over exactly which responses land in each segment.
Prefer to move faster? Use the new Create Through Prompt option: just describe what you're looking for in plain language, and Caplena will generate the segment for you. Great for exploring your data or quickly setting up common groupings without having to configure each filter by hand.
One of the most requested improvements: you can now create multiple segments in a single flow, rather than going back and forth through the editor one by one. Select the values you want to work with and create segments from them in bulk — a big time-saver when you're setting up a new project or reorganizing an existing one.
Once a segment exists, editing it is straightforward. You can update the name, adjust the filters, and pick a custom color from a full color picker (in manual- or in auto-assign mode) — so your segments are easy to tell apart at a glance in charts and tables.
You can also control visibility: choose which segments are shown or hidden in your views, keeping things clean when you're working with a large number of groups.
The updated Segment Editor is available now across all projects via Edit Master. Give it a try and let us know what you think.